

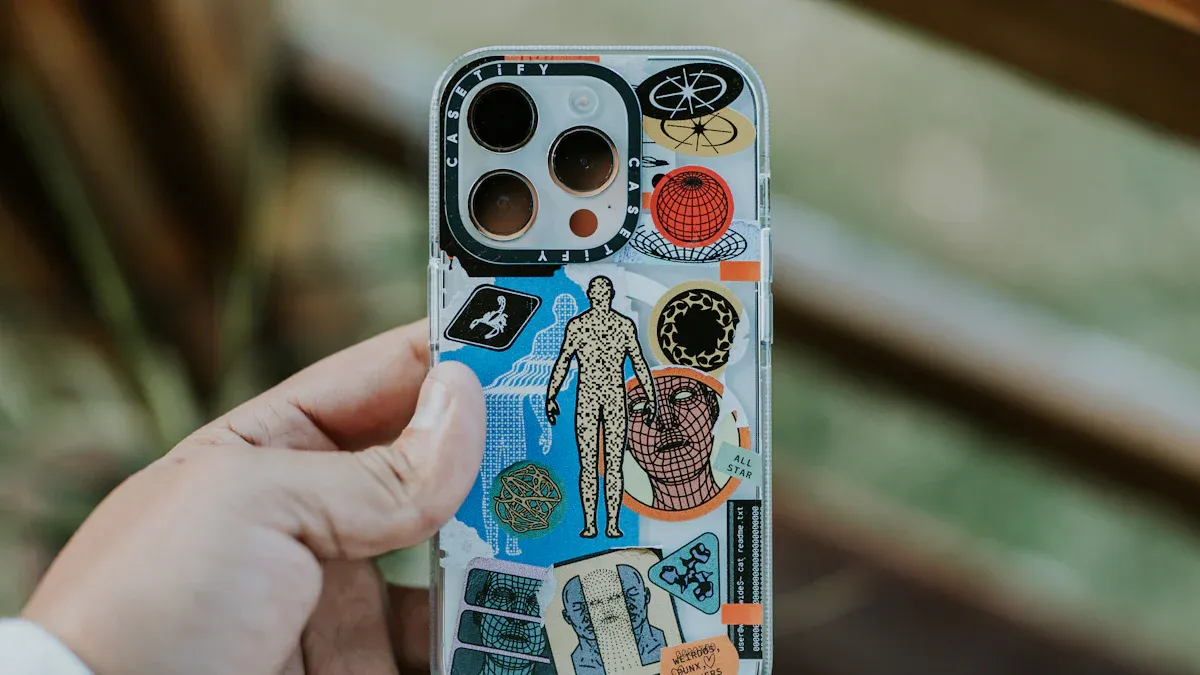
You can make a phone case that truly stands out by using your favorite photos and a bit of creativity. Today, more people want a personalized phone case because it feels special and shows off their style. In fact, 71% of millennials see their phone case as a fashion accessory, and posts with custom cases get 32% more engagement on Instagram. Why not try your own phone case design ideas? You just need a few simple steps to get started.
Key Takeaways
- Pick a phone case that fits your phone. Make sure it protects your phone well. Use clear photos with high quality. They should be at least 300 DPI. Save them as PNG or JPEG files. This helps your prints look sharp and clear. Get everything you need before you start. You need your photos, a good case, and design tools or an online service. Upload your photos with care. Crop, turn, and move them to fit in the safe print area. Add things like text or graphics to make it special. Keep them away from the edges and camera holes. Look at your design closely before you order. Check where things are, the colors, and if it looks clear. Pick the best printing method for your design. Sublimation is strong. Vinyl is good for bright graphics. Take care of your custom case. Clean it gently and do not drop it. This keeps it looking new.
Personalized Phone Case Basics
Choose Case Type
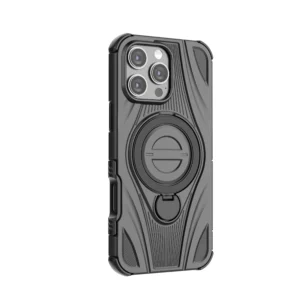
You want your personalized phone case to fit your phone perfectly and protect it from drops. Start by checking your phone model. Every phone has a slightly different shape, so make sure you pick a case made for your exact device. You can choose from different types, like slim cases, tough cases, or clear cases. Some cases use advanced materials like polyurethane or TPU. These materials help protect your phone and feel comfortable in your hand. Many high-quality phone cases use injection overmolding or in-mold labeling. These methods make the case strong and keep your custom photo cases looking bright and new for a long time.
Pick Your Photos
Now comes the fun part—choosing the right photos! Think about what makes you smile. Maybe you want to use a favorite selfie, a family picture, or a cool landscape. Choosing the right photos is important because they show off your style. You can even use more than one photo to create a collage. When you pick your photos, make sure they are clear and not blurry. Custom photo cases look best when you use high-resolution images. Try to use photos that are at least 300 DPI. This means your pictures will print sharp and not look fuzzy. If you want your custom phone case to stand out, always focus on choosing the right photos that mean something to you.
Tip: Use photos in PNG or JPEG format with a minimum of 300 DPI for the best results. This helps your custom photo cases look crisp and professional.
Gather Materials
Before you start the process, gather everything you need. Here’s a quick checklist:
- Your chosen photos (high-resolution, 300 DPI, sRGB color mode)
- A clear or blank phone case that fits your phone model
- Editing tools or apps (many online platforms offer easy-to-use design tools)
- Access to a printer or an online service for custom photo cases
You can use online platforms like CASETiFY or Shutterfly. These sites let you upload your photos, arrange them, and order your personalized phone case in just a few clicks. If you like hands-on projects, you can try a DIY method at home. Just remember, using professional design software and submitting your artwork in the right format (like PDF) helps you get the best print quality. Always check your design before you print or order. This way, your custom phone case will turn out exactly how you want.
Note: If you want to make sure your custom photo cases look great, ask for a sample first or talk to the printer about your design. This helps you avoid surprises and get the perfect personalized phone case.
Design Your Own Phone Case Steps
Upload Photos
Ready to start? The first step is uploading your photos. Most online platforms make this super easy. You just click the “Upload” button and pick your favorite photo from your phone, computer, or even your social media. You can upload more than one photo if you want to create a collage or try different looks.
Tip: Before uploading your photos, check that each photo is clear and high-resolution. Blurry photos will not look good on your case.
Uploading your photos is a big part of the process. You want to choose images that show your style and make you smile every time you look at your phone. Some sites let you drag and drop your photo right onto the design area. Others let you pick from your gallery. Try different photos to see which one fits your design best.
Edit and Arrange
Now it’s time to get creative! After uploading your photos, you can start to design your own phone case. Most design tools give you lots of options to play with. You can move your photo around, change the size, or even add more photos for a fun collage.
Crop and Rotate
Sometimes your photo needs a little tweak to fit just right. Use the crop tool to cut out parts you don’t want. Maybe you want to zoom in on a face or focus on a special detail. Cropping helps you do that. If your photo is sideways or upside down, use the rotate tool. You can spin your photo until it looks perfect.
- Crop to remove unwanted edges.
- Rotate to get the best angle.
- Zoom in or out to highlight your favorite part.
Adjust Placement
Placement is important when you design a custom phone case. Drag your photo to the spot you like best. Make sure nothing important gets cut off by the camera hole or edges of the case. Most design tools show a safe print area. Keep your photo inside this area so your design looks great when printed.
Note: Always check the preview to see how your photo fits on the case. Move your photo if you see anything important near the edge.
You can also layer photos if you want a collage. Try different placements until you find the one that feels right. This is your chance to create your design exactly how you want it.
Add Text or Graphics
Want to make your phone case even more personal? Add text or fun graphics! Most design tools let you type a name, a favorite quote, or even a special date. You can pick the font, color, and size. Some platforms offer stickers, emojis, or clip art to add extra flair.
- Type your message and move it where you want.
- Change the font style to match your vibe.
- Add stickers or graphics for a playful touch.
Tip: Keep your text away from the edges and camera cutout. This helps your message stay clear and easy to read.
Adding text or graphics is a great way to finish your design. You can make a phone case that is truly one-of-a-kind. When you create your design, have fun and try different ideas. The process lets you show off your personality and style.
Preview Design
Now comes the exciting part—seeing how your custom phone case will look before you order it. Most online platforms let you preview your design with a special tool. This tool shows a digital mockup of your phone case. You get to see exactly how your photos, text, and graphics fit on the case.
When you look at the preview, pay close attention to these things:
- Check if your photo lines up with the safe print area. Make sure nothing important gets cut off by the camera hole or the edges.
- Look at the colors. Sometimes, colors on your screen look different from the printed case. If you want bright colors, try boosting the contrast or brightness in your design.
- Read any text you added. Make sure it is easy to read and not too close to the edge.
- See if your stickers or graphics look clear and sharp.
Tip: Use the zoom feature on the preview tool. This helps you spot small details you might miss at first glance.
A design mockup gives you a real sense of how your finished phone case will appear. You can turn the mockup around, view it from different angles, and even switch between phone models. This step helps you catch mistakes before you print.
If you see something you want to change, go back to the design tool. Move your photo, adjust the size, or pick a new font. You can keep editing until you love your design. Some platforms let you save your mockup, so you can show it to friends or family for feedback.
Here’s a quick checklist for your preview:
- Does your design fit inside the safe print area?
- Are all important parts of your photo visible?
- Is your text clear and in the right spot?
- Do your colors look good?
- Are your graphics or stickers sharp?
Note: Always double-check your design mockup before you hit “Order.” This step saves you from surprises and helps you get the perfect custom phone case.
You have full control over your design. Take your time with the preview. Make sure every detail matches your style. When you feel happy with the mockup, you are ready to move on to the next step—printing your custom phone case!
Custom Photo Cases Printing
Submit Design
You finished your design and checked the preview. Now it’s time to send your custom photo cases for printing. Most online platforms make this step simple. You just click the “Submit” or “Order” button. The website will ask you to review your design one last time. Double-check everything—make sure your photos look sharp, your text is clear, and nothing important sits near the edges or camera cutout. This is a big part of finalising your custom case. If you spot a mistake, go back and fix it before you continue.
Tip: Always save a copy of your design. Some sites let you download a proof or email it to yourself. This helps if you want to reorder or share your custom phone case with friends.
Printing Methods
When you order custom photo cases, you get to choose from different printing methods. Each method gives a different look and feel. Here’s what you can expect:
Sublimation Printing
Sublimation printing uses heat to transfer your photo onto the case. The colors sink into the material, so your design feels smooth and lasts a long time. This method works great for custom photo cases because it gives strong, durable colors. You won’t see your image peel or fade quickly. However, sublimation can’t match the super fine detail you get from digital printing. If you want bold colors and a design that lasts, sublimation is a solid choice.
Vinyl Application
Vinyl application uses a special sticker or film. The printer cuts your design from colored vinyl and presses it onto the case. This method works well for simple shapes, bold text, or logos. Vinyl feels a bit raised and can peel over time, but it gives bright, eye-catching colors. If you want a custom phone case with a simple, bold look, vinyl might be right for you.
Here’s a quick look at how different printing methods compare:
| Printing Method | Print Quality Characteristics | Suitability |
|---|---|---|
| Digital Printing | Photorealistic, fine detail, slightly less vibrant colors | Detailed photos, high-end cases |
| Screen Printing | Vibrant, long-lasting colors, less fine detail | Simple motifs, bold designs |
| Sublimation | Strong, durable colors, less fine detail | Everyday custom photo cases |
| Vinyl Application | Bright, bold, raised feel, can peel | Simple graphics, text, logos |
| UV Printing | High color brilliance, durable | Premium custom photo cases |
Note: Offset and flexographic printing are used for large batches. Offset gives the best detail but creates more waste. Flexo is cheaper but not as sharp.
Order Online
After finalising your custom case, you just need to place your order. Fill in your shipping details and pick your payment method. Before you pay, check your order summary. Make sure you picked the right phone model, case type, and design. This step helps you avoid mistakes and get the custom phone case you want.
- Review your design and order details.
- Check the estimated delivery time.
- Look for any special instructions from the printer.
Most companies send you a confirmation email. You can track your custom photo cases as they get made and shipped. If you have questions, reach out to customer service. They can help with any part of the process.
Remember: Taking a few extra minutes to review your order makes a big difference. You want your custom photo cases to look perfect when they arrive!
Creating Your Custom Case DIY
Print at Home
You can start creating your custom case right at home. First, pick a high-quality photo or design. Open it on your computer and make sure it fits the size of your phone case. Most people use regular inkjet printers, but for the best results, try sublimation ink and special transfer paper. Print your image in mirror mode. This way, the design will look correct when you transfer it to the case.
Tip: Always use the highest print quality setting. This helps your colors look bright and sharp.
Cut out your printed image so it matches the shape of your phone case. Take your time with this step. A neat cut makes your case look professional. If you want to know how to make custom cases that really stand out, pay attention to the details during printing and cutting.
Transfer Image
Now you need to move your printed image onto the phone case. This step is where your design comes to life.
Heat Press or Iron
You can use a heat press if you have one. Place the image face down on the case. Set the heat press to about 350°F (175°C) and press for 60 seconds. If you do not have a heat press, you can use a regular household iron. Put a piece of parchment paper over the image. Press down firmly for about 2-3 minutes. Move the iron slowly to cover the whole area. Let the case cool before you peel off the paper.
Note: Always follow the instructions for your transfer paper. Some papers need more heat or time.
If you want to learn how to make custom cases with bright, lasting images, use enough heat and pressure. This helps the colors stick to the case and last longer.
Decorate with Materials
You can add even more style after you transfer your image. This is where you get creative and make your phone case unique.
Resin, Stickers, Silicone
Try using clear resin to give your case a glossy, glass-like finish. Pour a thin layer over your design and let it dry for a few hours. You can also add fun stickers or gems for extra sparkle. Silicone paint or puffy paint lets you draw shapes or write words right on the case. Mix and match these materials to show off your personality.
Here are some ideas for decorating:
- Add glitter or confetti under the resin for a sparkly effect.
- Use themed stickers for holidays or special events.
- Draw borders or doodles with silicone paint.
Tip: Let each layer dry before adding the next. This keeps your decorations neat and long-lasting.
Creating your custom case at home lets you try new ideas and have fun. You get to decide how your phone case looks and feels. If you ever wondered how to make custom cases that no one else has, this is your chance to experiment and shine.
Dry and Cure
You’ve finished decorating your phone case, and now you need to let it dry and cure. This step makes a big difference in how your case looks and how long it lasts. If you rush, your decorations might smudge or peel off. Take your time and let each layer set before you use your new case.
Start by placing your phone case on a flat surface. Make sure the area is clean and dust-free. If you used resin, stickers, or paint, keep the case away from direct sunlight or heat. Sunlight can cause colors to fade or resin to bubble. A cool, dry spot works best.
Here’s a simple checklist to help you:
- Set your case on a flat, clean surface.
- Leave it alone for at least 12 hours if you used stickers or paint.
- Wait 24 hours or more for resin or thick decorations to cure.
- Check the case by gently touching a corner. If it feels sticky, give it more time.
- Avoid stacking anything on top of your case while it dries.
Tip: If you want to speed up drying, use a small fan. Don’t use a hair dryer or heater. High heat can damage your design.
Some materials, like resin, need extra time to cure. Curing means the material hardens all the way through, not just on the surface. If you skip this step, your decorations might chip or peel off when you use your phone. Patience pays off here. You want your custom case to look great and last a long time.
If you used glue or silicone paint, check the instructions on the package. Some glues dry in an hour, but others need a full day. Always follow the directions for the best results.
After your case dries and cures, give it a gentle wipe with a soft cloth. This removes any dust or fingerprints. Now your case is ready to use or give as a gift. You’ve finished creating your custom case, and you can show off your style every time you pick up your phone.
Note: If you want your case to last, avoid dropping it or scratching the surface. Handle it with care, especially in the first few days.
Best Results Tips
Photo Quality
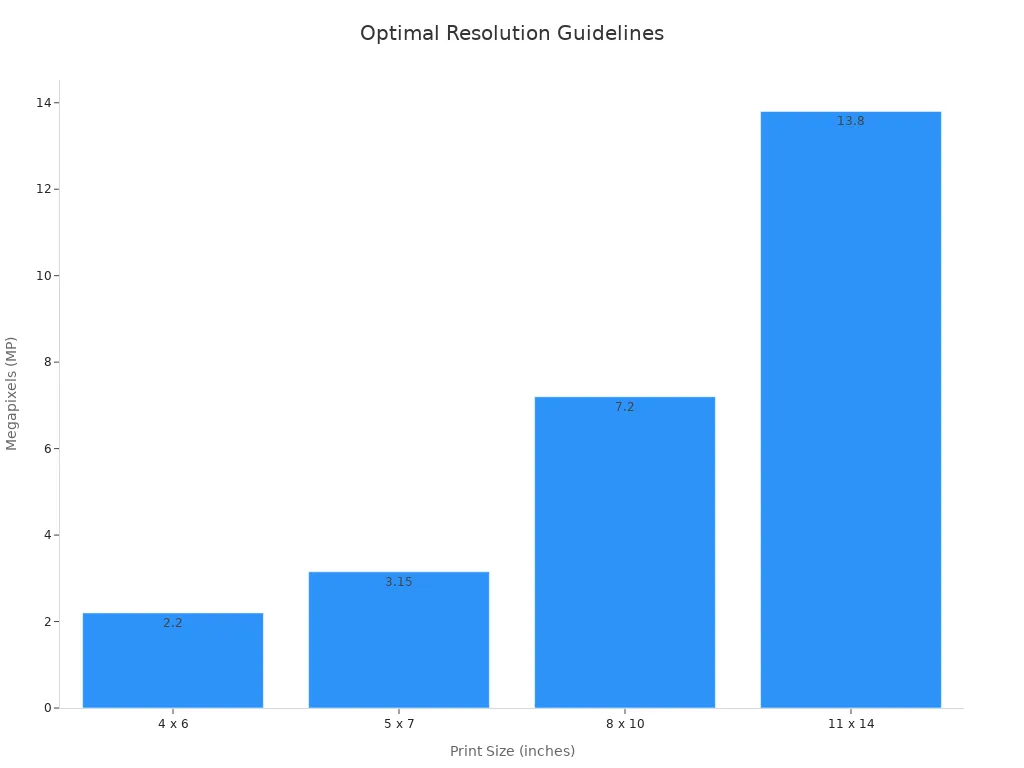
You want your custom phone case to look sharp and colorful. The secret starts with your photo. Always use high-resolution images. If your photo is blurry or too small, the print will not look good. For the best results, choose photos that are at least 300 PPI (pixels per inch). This makes sure every detail stands out on your case.
Here’s a quick guide to help you pick the right size for your photo:
| Print Size (inches) | Pixels for Good Quality (180 PPI) | Pixels for Better Quality (240 PPI) | Pixels for Best Quality (300 PPI) |
|---|---|---|---|
| 4 x 6 | 720 x 1080 | 960 x 1440 | 1200 x 1800 |
| 5 x 7 | 900 x 1260 | 1200 x 1680 | 1500 x 2100 |
| 8 x 10 | 1440 x 1800 | 1920 x 2400 | 2400 x 3000 |
Tip: For most phone cases, a photo that is at least 1200 x 1800 pixels will give you a crisp, clear print.
When you focus on photo quality and selection, you get a phone case that pops. Always check your photo before you upload it. If you zoom in and it still looks clear, you are good to go.
Design Placement
You spent time picking the perfect photo, so make sure your design looks great on your case. Always check the placement of your photo in the design tool. Keep important faces, words, or details away from the edges and camera cutout. If you put something too close to the edge, it might get trimmed off during printing.
Here’s a simple checklist for design placement:
- Keep main parts of your photo in the center.
- Leave space around the edges.
- Double-check the preview before you order.
Note: Most online tools show a safe area. Make sure your design fits inside this space.
When you pay attention to design placement, your phone case will look just how you imagined. Good photo quality and selection, plus smart placement, make a big difference.
Care and Maintenance
You want your custom phone case to stay bright and clean. Take care of it with a few easy steps. Wipe your case with a soft, damp cloth to remove dirt. Avoid using harsh cleaners or scrubbing too hard. If you used extra decorations like resin or stickers, handle your case gently.
- Keep your phone case out of direct sunlight for long periods.
- Don’t drop your case or scratch the surface.
- If your case gets wet, dry it with a towel right away.
Tip: Store your phone case in a cool, dry place when you are not using it.
With the right care, your design will stay fresh and your photo will keep looking great. A little attention goes a long way in keeping your custom phone case looking new.
Custom Phone Case Gifting
Gift Ideas
Giving a gift that feels special shows you care. Custom photo cases are great for almost any event. You can use a family photo, a pet’s picture, or a fun design your friend likes. These cases are perfect for birthdays, graduations, anniversaries, or holidays. People enjoy gifts that feel unique and personal.
Last year, 65% of people bought personalized gifts. About 80% think these gifts are more thoughtful than regular ones. Many people want to buy even more personalized gifts next year. Here’s how popular these gifts are:
| Statistic / Insight | Value / Description |
|---|---|
| Percentage of consumers who purchased personalized gifts in the last year | 65% |
| Consumers who believe personalized gifts are more thoughtful | 80% |
| Consumers planning to buy more personalized gifts in the future | 42% |
| Popular personalized gift categories including tech gadgets | Jewelry, Home Decor, Clothing & Accessories, Tech Gadgets (custom phone cases included) |
| Occasions for personalized gifts | Birthdays, Weddings, Anniversaries, Graduations |
| Benefits of personalized gifts | Emotional connection, uniqueness, memorability, versatility |
Custom photo cases are very popular for birthdays and weddings. Many people like gifts with a personal touch. About 67% of Americans would rather get a personalized item for a holiday or special event than a regular product. When you give a custom photo case, you help make memories and bring smiles.
Did you know? 70% of people feel happier when they give a personalized gift that reminds them of good times.
Sharing Designs
You can make giving custom photo cases even more fun by sharing your designs. Show your friends and family the case you made before you give it. Post a photo on social media or send a sneak peek in a message. Many people love seeing creative ideas and may want to try making their own.
Getting a custom photo case as a gift makes people feel special. Personal gifts can boost customer happiness by 20%. People who get personalized gifts are more likely to buy again and tell others about your idea. Here are some cool facts:
- 80% of people are more likely to buy again when their gift is personalized.
- 92% of customers who get a gift will tell friends about the brand.
- Over 82% of people feel better about a brand after getting a personalized gift.
You can inspire others by sharing your custom photo cases online. Use hashtags or tag the brand you used. This helps others find ideas and join the fun. If you want to make someone’s day, try giving a custom photo case and share how you made it. You might inspire someone else to do the same!
You can design a phone case that feels special and shows your style. Personalized phone cases are more popular than ever. The market keeps growing because people love unique designs for themselves and as gifts. You get to express who you are and make someone smile. Try making your own case or share your creation with friends. Ready to start? Let your creativity shine and make your phone stand out! 🚀
FAQ
How do I know if my photo is high enough quality for printing?
Check your photo’s resolution. You want at least 1200 x 1800 pixels or 300 DPI. If you zoom in and the image stays clear, you’re good to go!
Can I use photos from social media for my phone case?
You can, but social media photos often have lower resolution. Download the original file if possible. This helps your case look sharp and not pixelated.
What if I make a mistake in my design before ordering?
Most platforms let you preview and edit your design before you order. Always double-check the preview. If you spot a mistake, just go back and fix it.
Will the colors on my phone case match what I see on my screen?
Colors may look a little different after printing. Screens use light, but printers use ink. For brighter colors, boost the contrast or brightness before uploading.
How do I clean my custom phone case?
Use a soft, damp cloth to wipe your case. Avoid harsh cleaners or scrubbing. For cases with decorations, handle gently to keep everything looking new.
Can I design a phone case as a gift for someone else?
Absolutely! Personalized phone cases make great gifts. You can use a favorite photo, add a name, or include a special message. 🎁