
Customizing your phone case in 2025 feels easier than ever. You just grab a clear phone case and let your creativity shine. People everywhere love this trend, with the global phone case market growing steadily and Americans replacing their phones about every three years. You can try markers, paint pens, pressed flowers, or even photos for creating a personalized phone case. The DIY market keeps booming, so you have endless options for customization. Ready to try a step-by-step guide that makes it simple and fun? Let’s get started!
Key Takeaways
- Customizing a clear phone case lets you express your personal style easily and affordably.
- Using reusable inserts like photos or fabric saves money and lets you change your phone’s look anytime.
- Choosing the right clear case—hard or soft with anti-yellowing features—protects your phone and keeps your design fresh.
- Gather simple tools and popular materials like markers, stickers, and pressed flowers to start your project.
- Plan your design by finding inspiration, sketching ideas, and picking colors that match your mood or theme.
- Prepare a clean, organized workspace with good lighting to make customizing fun and mess-free.
- Follow step-by-step instructions to clean, decorate, layer materials, and insert your design for a perfect fit.
- Seal your design with clear coats to protect it from scratches and fading, and care for your case regularly to keep it looking new.
Why Customize?
Personal Style
You want your phone to stand out, right? Customizing your phone case gives you a chance to show off your personal style every day. You can pick colors, patterns, or even photos that mean something special to you. Over 65% of tech-savvy millennials and Gen Z shoppers look for products that let them express themselves. That’s a huge number! People love having options to personalize their stuff, and a custom phone case is one of the easiest ways to do it.
| Statistic Category | Percentage / Metric | Explanation |
|---|---|---|
| Personal Expression Demand | 65% | Millennials and Gen Z want products for personal expression |
| Preference for Personalization | 75% | Consumers prefer personalized design |
| Customer Retention Boost | 40% | Brands see higher loyalty with custom design options |
You can try so many customization options, from stickers to paint pens. You get to personalize your phone case to match your mood, your favorite band, or even your pet. The best part? You don’t need to be an artist. You just need a little creativity and the right materials.
Cost Savings
Buying a new phone case every season gets expensive. When you start personalizing your phone case, you save money by reusing the same clear case and just swapping out the design. You can use things you already have at home, like old photos, fabric scraps, or stickers. You don’t need to spend a lot to get a fresh look. Many people find that making a custom phone case costs less than buying a new one from the store. Plus, you get a personalized phone case that no one else has.
Tip: Try making inserts you can swap out whenever you want a new look. This way, you get more options without spending more.
Eco-Friendly
You care about the planet, and so do many others. Customizing your phone case helps you cut down on waste. Instead of tossing out old cases, you can refresh your look with new designs. The market for eco-friendly phone cases keeps growing. More brands use recycled plastics, biodegradable materials, and even compostable options like wheat straw or bamboo.
| Evidence Aspect | Details |
|---|---|
| Consumer Environmental Awareness | 93% of EU citizens care about environmental protection; 67% of U.S. consumers seek green goods |
| Material Innovations | Biodegradable polymers, recycled plastics, and natural fibers are now common |
| Industry Examples | Brands like Pela and CASETiFY recycle old cases into new designs |
You can personalize your phone case with sustainable materials, too. Try using fabric scraps, recycled paper, or even pressed flowers. Every time you reuse or upcycle, you help reduce plastic waste. You also support a growing movement for greener choices.
Trends 2025
You might wonder what’s hot in phone case customization for 2025. The market keeps growing, and you have more options than ever. People everywhere want their phones to look unique, and brands keep up with new materials, cool designs, and smart features.
Here’s a quick look at what’s shaping the world of custom phone cases this year:
| Aspect | Details |
|---|---|
| Market Size (2025) | $14.34 billion globally |
| Growth Rate (2025-2033) | 3.2% CAGR |
| Key Trends | Personalization, eco-friendly materials, new textures, added functions, foldable phone support |
| Regional Preferences | North America & Europe: premium/specialized cases Asia-Pacific: budget-friendly, high volume |
| Sales Channels | E-commerce leads the way |
| Environmental Focus | Push for sustainable, biodegradable, and recycled materials |
You see more people choosing cases that match their style or mood. You can pick from bold colors, holographic finishes, or even cases with built-in wallets. Many cases now support wireless charging and MagSafe, so you don’t have to give up convenience for style.
Eco-friendly options keep getting better. You find cases made from recycled plastics, wheat straw, or even compostable materials. Brands listen to customers who care about the planet. If you want to make your own case, you can use sustainable materials like fabric scraps or pressed flowers.
Tip: Try mixing textures and materials for a one-of-a-kind look. Layer stickers, use metallic paint pens, or add a fabric insert for extra flair.
Foldable phones are on the rise, so you see more cases designed just for them. If you have a foldable device, you can still join the customization fun. Companies now offer clear cases that fit these new shapes perfectly.
E-commerce makes it easy to find inspiration and buy supplies. You can order custom stickers, vinyl sheets, or even pre-cut inserts online. Many small brands and artists sell unique designs, so you support creativity and get something special.
Here’s what’s driving these trends:
- People want to show off their personality.
- Phones keep getting more fragile, so protection matters.
- New tech lets you try more materials and designs.
- Environmental rules push brands to go green.
You don’t have to follow every trend. Pick what feels right for you. Whether you love bold art, soft pastels, or eco-friendly vibes, 2025 gives you more ways to make your phone case truly yours.
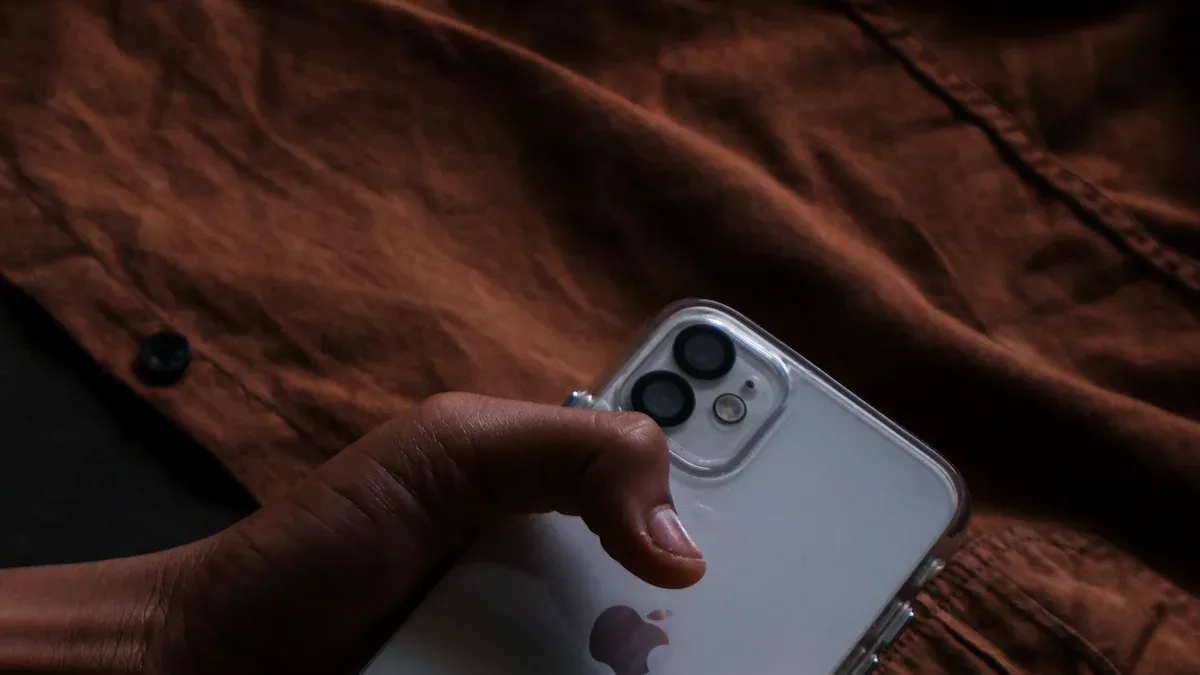
Choose Your Clear Phone Case
When you start customizing, choosing the perfect base case makes all the difference. You want a clear phone case that not only looks good but also gives reliable protection. Let’s break down your options so you can pick the best one for your style and needs.
Case Types
You’ll find two main types of clear phone cases on the market. Each one has its own perks and drawbacks.
Hard vs. Soft
- Hard Clear Cases
These cases use tough plastic like polycarbonate. They keep their shape and show off your design with a glossy finish. Hard cases resist scratches, but they can crack if you drop them hard. They feel sturdy and slim in your hand. - Soft Clear Cases
Soft cases use flexible materials like TPU (thermoplastic polyurethane). They absorb shocks better and handle drops well. You get a grippy feel, which helps prevent slips. Soft cases may turn yellow over time, but they rarely crack.
| Type | Pros | Cons |
|---|---|---|
| Hard | Scratch-resistant, slim look | Can crack, less shock absorb |
| Soft | Shock-absorbing, grippy | May yellow, less rigid |
Anti-Yellowing
No one wants a yellowed case after a few months. Many brands now offer anti-yellowing technology. These cases use special coatings or UV-resistant materials to keep your clear phone case looking fresh. If you want your design to stay bright, look for this feature when choosing the perfect base case.
Fit and Protection
Fit matters just as much as style. A snug clear phone case gives reliable protection without adding bulk. Consumer Reports and experts from top brands like OtterBox and Speck say you should check for raised edges around the screen and camera. These features help protect your phone from drops and scratches. Padded corners with air gaps also boost shock absorption.
You might see cases with military-grade drop test claims. Some, like SafeSleeve, even pass tough durability tests and offer extra features like EMF blocking. Still, don’t just trust marketing. Look for real user reviews and check if the case fits your phone model exactly. A good grip or a matte finish can help you avoid drops in the first place.
Tip: Always read recent reviews before you buy. Some listings reuse old feedback, so make sure the case you pick has a track record for fit and durability.
When you focus on fit and protection, you get a clear phone case that keeps your phone safe and makes your custom design last longer. With so many options out there, you can find a case that matches your creative vision and daily routine.
Gather Materials
Before you start customizing, you need the right tools and materials. This step sets you up for a smooth, creative process. You have so many options, and you can keep things simple or go all out. Let’s break down what you’ll need.
Essential Tools
You don’t need fancy equipment to get started. Most people already have these basics at home:
- Scissors (for cutting inserts or fabric)
- Tweezers (for placing small items like pressed flowers)
- Ruler (for measuring your case and inserts)
- Pencil or pen (for sketching your design)
- Cotton swabs and rubbing alcohol (for cleaning the case)
- Clear tape or glue (for securing decorations)
Tip: Lay out your tools before you begin. This keeps your workspace organized and helps you avoid mistakes.
Popular Materials
You have endless options for decorating your clear phone case. Some materials work better than others, depending on your style and how often you want to change your design. Here’s a look at what’s trending and why people love these choices:
Permanent Markers
Permanent markers let you draw directly on your case. You can create bold lines, doodles, or even write your favorite quote. These markers work well on both hard and soft cases. They dry quickly and resist smudging, so your design lasts longer.
Paint Pens & Nail Polish
Paint pens add vibrant color and detail. Nail polish gives you glossy finishes and fun effects like glitter or metallic shine. Both options stick well to plastic and silicone. Just remember to let each layer dry before adding more.
Photos & Prints
Want to show off your favorite memories? Print your photos at home or use a photo service. Cut them to fit your case, then slide them inside or attach them with clear tape. You can swap out photos whenever you want a new look. Many people love this method because it’s personal and easy to update.
Fabric & Tape
Fabric scraps add texture and color. Washi tape or decorative masking tape gives you endless patterns and is easy to remove. These options let you change your design as often as you like without damaging your case.
Pressed Flowers
Pressed flowers bring a natural, delicate touch. You can arrange them under the case or seal them with clear adhesive. This trend keeps growing as more people look for eco-friendly ways to decorate.
Stickers & Decals
Stickers and decals offer quick, mess-free customization. You can find thousands of designs online, from cute animals to bold graphics. They stick well to most surfaces and peel off without leaving residue.
Vinyl & Adhesive Paper
Vinyl sheets and adhesive paper let you cut custom shapes or letters. These materials work well for layering and can handle daily wear. Many crafters use digital cutting machines for precise designs.
- About 88% of mobile users use phone cases, and over a billion plastic cases sell each year. This creates a lot of waste, so more people choose sustainable materials like bamboo, cork, or recycled plastics.
- Eco-friendly cases protect your phone just as well as regular ones. They last long, look great, and support green manufacturing.
- Digital UV printing and screen printing both work for customizing cases. UV printing gives you sharp details and works on many surfaces, while screen printing is best for big batches.
Reusable Templates
Templates help you trace and cut inserts that fit your case perfectly. You can find free templates online or make your own by tracing your phone case on paper. Reusable templates save time and help you get clean, professional results every time you want to print your photos or try new options.
Note: Keep your templates in a folder or notebook. You’ll always have them ready for your next project.
Plan Your Design
Inspiration Sources
You might feel stuck when you start personalizing your phone case. Don’t worry—finding design inspirations is easier than you think. Start by looking at your favorite things. Maybe you love a certain color, a band, or a hobby. Scroll through Pinterest, Instagram, or TikTok for trending ideas. Many people share their custom cases online, so you can see what’s popular right now.
Try these quick ways to spark your creativity:
- Check out art and fashion blogs for fresh patterns.
- Look at nature for color combos—flowers, sunsets, or even your pet’s fur.
- Flip through magazines or old notebooks for cool graphics or quotes.
Tip: Save your favorite design inspirations in a folder on your phone. You can always come back to them when you want to create your design.
Sketch or Digital Mockup
Once you gather ideas, it’s time to create your design. You don’t need to be an artist. Grab a pencil and sketch your idea on paper. This helps you see how everything fits on your case. If you like tech, try a free app or website to make a digital mockup. Many people use Canva or Procreate for this step.
A digital mockup lets you move things around until you find the perfect layout. You can test different stickers, colors, or photos without making a mess. If you want a truly unique design, try layering different elements. You might add a quote over a photo or mix patterns for a bold look.
Note: Print your sketch or mockup at the actual size of your phone case. This makes it easier to trace or cut inserts later.
Color & Theme Choices
Choosing colors and a theme sets the mood for your personalized phone case. Think about what makes you happy. Do you want something bright and bold, or soft and pastel? Maybe you want a seasonal vibe, like autumn leaves or summer waves.
Here’s a simple table to help you pick a theme:
| Theme | Color Palette | Mood |
|---|---|---|
| Minimalist | Black, white, gray | Calm, modern |
| Nature | Green, brown, floral | Fresh, peaceful |
| Retro | Neon, pastel, bold | Fun, nostalgic |
| Glam | Gold, silver, glitter | Luxe, trendy |
When designing, try to stick to two or three main colors. This keeps your case looking clean and stylish. If you want to personalize your case even more, add your initials or a small symbol that means something to you.
Personalizing your phone case should feel fun, not stressful. Trust your instincts and enjoy the process. You can always change your mind and create your design again later. Remember, the best part of customization is making something that feels like you.
Workspace Prep
Getting your workspace ready makes customizing your clear phone case way more enjoyable. You don’t need a fancy craft room—just a little organization and the right setup. When you prep your space, you avoid messes, protect your phone, and keep your creativity flowing.
Here’s how you can set up your workspace for success:
- Pick the Right Spot
Choose a flat, well-lit surface. A kitchen table, desk, or even a clean floor works great. Good lighting helps you see details and avoid mistakes. If you can, work near a window for natural light. - Cover Your Surface
Lay down some newspaper, an old towel, or a silicone mat. This protects your table from paint, glue, or marker stains. You can clean up faster and worry less about spills. - Gather Your Supplies
Keep all your tools and materials within arm’s reach. Use a small tray, box, or even a muffin tin to organize things like scissors, markers, stickers, and templates. You won’t waste time searching for that one pen or piece of tape. - Keep It Clean
Wipe down your phone case and workspace before you start. Dust and oils can mess up your design. Use a lint-free cloth or a cotton swab with a little rubbing alcohol for a spotless case. - Protect Your Phone
Take your phone out of the case before you decorate. Set your phone aside in a safe spot—maybe on a soft cloth or in another room. This keeps it safe from paint splatters or glue drips. - Ventilation Matters
If you use paint pens, nail polish, or glue, open a window or turn on a fan. Good airflow keeps you comfortable and safe from strong smells.
Tip: Play your favorite playlist or podcast while you work. Music makes the process more fun and helps you relax.
Workspace Prep Checklist
| Task | Why It Matters | Quick Tip |
|---|---|---|
| Choose a flat surface | Prevents spills and accidents | Use a tray for small spaces |
| Good lighting | Helps you see details | Try a desk lamp if needed |
| Organize supplies | Saves time and reduces stress | Muffin tins work for storage |
| Clean case and hands | Keeps design crisp and neat | Use alcohol wipes |
| Remove phone from case | Protects your device | Place phone in another room |
| Ventilate area | Safety with paints and glues | Open a window or use a fan |
You don’t need to overthink it. A little prep goes a long way. When your space feels ready, you can focus on being creative instead of cleaning up messes. You’ll find that customizing your phone case becomes a relaxing, enjoyable project.
Note: If you’re working with friends or family, set up a bigger space and share supplies. Group DIY sessions make the experience even more fun!
Now that your workspace is prepped, you’re all set to start customizing. Grab your materials, take a deep breath, and let your creativity shine! 🎨📱
Step-by-Step Customization Process
Ready to make a phone case that feels truly yours? Let’s walk through the step-by-step customization process. You’ll find each step simple, clear, and easy to follow—even if you’ve never tried this before. Many users say that having a numbered list of steps helps them avoid confusion and finish their projects with confidence. So, let’s dive in!
Clean the Case
Start with a spotless surface. Dust, fingerprints, or oils can mess up your design and stop stickers or paint from sticking. Here’s how you can get your clear phone case ready:
- Remove your phone from the case.
- Wipe the case with a lint-free cloth. If you see stubborn spots, use a cotton swab dipped in rubbing alcohol.
- Let it dry for a few minutes. Make sure there’s no moisture left.
Tip: Don’t skip this step! Clean cases help your decorations last longer and look sharper.
Many people find that prepping the case first prevents frustration later. Usability testing shows that users who start with a clean case have fewer problems with peeling or smudging.
Trace and Cut Inserts
Want to swap out designs whenever you feel like it? Inserts are your best friend. You can use photos, prints, or fabric. Here’s how you can make inserts that fit perfectly:
- Place your case on a piece of paper or your chosen material.
- Trace around the outside with a pencil.
- Mark the camera and button holes so you don’t cover them by accident.
- Cut out the shape carefully with scissors.
- Test the fit by sliding the insert into your case. Trim any edges if needed.
Note: Templates save time. Keep your first cutout as a reusable guide for future designs.
Surveys and session recordings show that beginners love using templates. They help you avoid mistakes and make the process faster. If you want to make a phone case that you can update often, inserts are the way to go.
Apply Paint or Markers
Feeling artsy? Paint pens and permanent markers let you draw directly on your clear phone case. You can doodle, write quotes, or create patterns. Here’s a quick guide:
- Sketch your design on paper first. This helps you plan and avoid mistakes.
- Use light pencil lines on the inside of the case as a guide, if you want.
- Draw or paint on the outside of the case. Start with outlines, then fill in colors.
- Let each layer dry before adding more details or colors.
- Seal your design with a clear coat if you want extra protection.
🎨 Pro Tip: Test your markers or paint on a scrap piece of plastic first. This helps you see how the colors look and how fast they dry.
Many users say that step-by-step instructions with practical examples make painting much less intimidating. If you make a mistake, don’t worry! You can wipe off most paint or marker with rubbing alcohol before it dries. This makes customization stress-free and fun.
By following these steps, you set yourself up for a smooth and enjoyable experience. Clear, ordered instructions help you avoid common pitfalls and keep your creativity flowing. Now you’re ready to move on to adding photos, fabric, or other fun touches!
Add Photos or Fabric
You can give your clear phone case a personal touch by adding photos or fabric. This method works great if you want to show off your favorite memories or add a pop of color and texture. Using personal photos makes your phone case unique and meaningful. Here’s how you can do it:
- Pick Your Photo or Fabric
Choose a photo that makes you smile or a fabric scrap with a fun pattern. You can print photos at home or use ones from a photo booth. For fabric, try cotton, denim, or even lace. - Trace and Cut
Place your phone case on the back of your photo or fabric. Trace around the edges with a pencil. Mark the camera and button holes. Cut out the shape carefully. - Test the Fit
Slide the photo or fabric inside the case. Make sure it lines up with the camera and buttons. Trim any extra edges if needed. - Secure the Insert
If you want the insert to stay in place, use a small piece of clear tape or a dab of glue on the corners. For fabric, double-sided tape works well. - Assemble Your Case
Put your phone back in the case. Now you have a custom look that you can swap out anytime.
Tip: Try layering a sheer fabric over a photo for a cool effect. You can also use scrapbook paper or magazine cutouts for more options.
A table can help you compare the pros and cons of each material:
| Material | Pros | Cons |
|---|---|---|
| Photos | Personal, easy to swap | Can fade over time |
| Fabric | Adds texture, many patterns | May fray at the edges |
You can make a phone case that matches your mood or the season. Change the insert whenever you want a new vibe.
Use Stickers or Decals
Stickers and decals are the fastest way to decorate your clear phone case. You can find thousands of designs online or in stores. From cute animals to bold graphics, there’s something for everyone.
Here’s how you can get started:
- Choose Your Stickers or Decals
Pick a theme or mix and match different styles. Vinyl stickers last longer and resist water. - Plan Your Layout
Arrange the stickers on your case before peeling off the backing. This helps you see what looks best. - Apply Carefully
Peel and stick one at a time. Start from the center and smooth out any bubbles with your finger or a credit card. - Seal for Extra Protection
If you want your design to last, add a layer of clear phone case sealant or clear nail polish over the stickers. Let it dry completely.
Note: If you want to change your design often, use removable stickers. They peel off without leaving sticky residue.
Stickers let you update your phone case as often as you like. You can celebrate holidays, show off your favorite band, or just try a new look every week.
Layer Materials
Layering materials takes your custom phone case to the next level. You can combine photos, fabric, stickers, and even pressed flowers for a one-of-a-kind design. This method lets you play with color, texture, and depth.
Try these steps for layering:
- Start with a base insert, like a photo or a piece of patterned paper.
- Add a layer of fabric or washi tape for texture.
- Place stickers or decals on top for extra detail.
- Use pressed flowers or glitter for a natural or sparkly touch.
- Seal your design with a clear coat if you want it to last longer.
Tip: Don’t be afraid to experiment. If you don’t like how it looks, just peel off a layer or swap out the insert.
A layered design helps you stand out. You can mix and match materials until you find a style that feels just right. This approach works well if you want to make a phone case that’s truly unique.
Insert and Adjust
You’ve finished your design—now it’s time for the most satisfying part: putting everything together! This step brings your creativity to life and makes your phone case truly yours. Here’s how you can insert your design and make those final tweaks for a flawless fit.
1. Insert Your Design
- For Inserts (Photos, Fabric, Paper):
- Hold your clear phone case with the back facing up.
- Gently slide your insert (photo, fabric, or paper) into the case. Start at one edge and work your way across.
- Line up the camera and button cutouts. Make sure nothing blocks the lens or ports.
- Smooth out any wrinkles or bubbles with your fingers or a soft cloth.
- For Direct Decorations (Paint, Stickers, Decals):
- Double-check that your paint or glue is completely dry.
- Inspect the surface for any smudges or dust. Wipe gently if needed.
- If you added layers, press down gently to secure everything.
Tip: If your insert feels loose, add a tiny piece of double-sided tape or a dot of glue in the corners. This keeps it from shifting but still lets you swap it out later.
2. Adjust for a Perfect Fit
Sometimes, your insert might not sit perfectly on the first try. Don’t worry—adjusting is easy!
- Check the Edges:
Look around the edges of your case. If you see any paper or fabric sticking out, remove the insert and trim it with scissors. - Align the Camera and Buttons:
Hold your phone case up to the light. Make sure the camera, flash, and buttons are clear. If something covers them, mark the spot and cut a little more. - Smooth Out Bubbles:
Use a credit card or your fingers to gently press out any air bubbles. Work from the center out to the edges. - Test the Fit:
Place your phone back in the case. Press along the sides and corners. Your phone should snap in easily, and the case should feel snug.
Note: If you want to swap designs often, keep your inserts in a small envelope or folder. This way, you can change your look anytime without making new ones from scratch.
3. Final Checklist Before You Go
Here’s a quick checklist to make sure your custom case looks and feels just right:
| Step | Done? (✅/❌) | Quick Reminder |
|---|---|---|
| Insert fits snugly | No loose edges or shifting | |
| Camera and buttons clear | Nothing blocks your phone’s features | |
| No bubbles or wrinkles | Smooth out with fingers or card | |
| Decorations fully dry | Avoid smudges or peeling | |
| Phone snaps in easily | Case feels secure and comfortable |
Take a moment to admire your work. You just created a custom phone case that shows off your personality and style. If you ever want a new look, just pop out the insert or peel off the stickers and start again.
🎉 Pro Tip: Snap a photo of your finished case! You’ll love seeing your progress and sharing your creativity with friends.
You did it! Your phone now has a one-of-a-kind case, and you have the skills to customize it anytime you want. Enjoy your new look and get ready for compliments!
Seal and Protect
You’ve finished your custom design, but you want it to last. Sealing your phone case helps keep your artwork safe from scratches, water, and fading. Let’s look at how you can give your case reliable protection and keep it looking fresh.
Clear Coat Options
You have a few choices when it comes to sealing your design. Each option gives you a different finish and level of reliable protection. Here’s a quick table to help you decide:
| Clear Coat Type | Finish | Best For | Notes |
|---|---|---|---|
| Spray Acrylic Sealer | Matte/Glossy | Paint, markers, stickers | Dries fast, even coverage |
| Clear Nail Polish | Glossy | Small areas, details | Use for touch-ups |
| UV Resin | Ultra-glossy | Heavy-duty protection | Needs UV light to cure |
| Mod Podge | Matte/Glossy | Paper, fabric inserts | Water-based, easy to use |
You can find these products at craft stores or online. Pick the one that matches your design and how much protection you want.
Application Tips
Applying a clear coat is simple, but a few tricks help you get the best results:
- Work in a well-ventilated area. Open a window or use a fan.
- Remove your phone from the case before you start.
- If you use a spray, hold the can about 8–10 inches away. Spray in light, even coats.
- For brush-on sealers, use a soft brush. Start with thin layers to avoid drips.
- Let each layer dry before adding another. Two or three coats usually work best.
- Cover the whole design, including the edges.
Tip: Test your clear coat on a scrap piece first. Some products can react with certain markers or paints.
Drying and Curing
Drying and curing make sure your design stays put. Don’t rush this step! Here’s what you should do:
- Let each coat dry for at least 20–30 minutes. Some products need longer.
- After the final coat, leave your case in a dust-free spot for several hours.
- For UV resin, use a UV lamp or sunlight to cure the surface. Follow the instructions on the package.
- Check that the case feels dry and smooth before putting your phone back in.
Patience pays off. When you let your case cure fully, you get a smooth finish and reliable protection that lasts. Now your custom phone case is ready for daily use!
Troubleshooting
Even with the best prep, you might run into a few hiccups while customizing your clear phone case. Don’t worry! Most problems have quick fixes. Here’s how you can handle the most common issues and keep your case looking awesome.
Bubbles & Wrinkles
Bubbles and wrinkles can sneak in when you use stickers, decals, or inserts. They might look annoying, but you can fix them.
- For Stickers and Decals:
Use a credit card or a soft cloth. Start at the center and push out toward the edges. This helps flatten bubbles as you go. If you spot a stubborn bubble, use a pin to poke a tiny hole, then smooth it out. - For Inserts (Photos, Fabric, Paper):
Take out the insert. Lay it flat and smooth it with your hands. If it still wrinkles, try trimming the edges a bit. Sometimes inserts are just a little too big.
Tip: Work slowly and avoid rushing. You get fewer bubbles when you apply materials gently and with patience.
Peeling & Fading
You might notice stickers peeling or colors fading after a while. This happens, especially if you use your phone a lot or keep it in your pocket.
- To Prevent Peeling:
Always clean your case before adding stickers or paint. Oils and dust make things peel faster. Press stickers down firmly, especially at the edges. For extra hold, use a clear coat or a bit of Mod Podge. - To Prevent Fading:
Choose high-quality markers, paints, or stickers. Some cheap products fade in sunlight. If you want your design to last, seal it with a UV-resistant spray or clear nail polish.
| Problem | Quick Fix | Prevention Tip |
|---|---|---|
| Peeling | Re-stick or use clear coat | Clean case before decorating |
| Fading | Touch up with fresh color | Use UV-resistant sealers |
If you see peeling, don’t panic. Just press the sticker back down or add a dab of glue.
Smudges & Mistakes
Smudges and little mistakes happen to everyone. You might bump your hand or use too much paint. No big deal!
- For Wet Paint or Marker:
Wipe away the smudge with a cotton swab and rubbing alcohol. Act fast before it dries. - For Dried Mistakes:
Use a gentle nail polish remover (acetone-free) on a cotton swab. Rub lightly so you don’t damage the case. - For Inserts:
Just swap out the insert for a new one. Keep extras handy for quick changes.
Note: Practice on a scrap piece first. You’ll feel more confident and make fewer mistakes.
Mistakes are part of the creative process. You learn something new every time. If you mess up, just try again. Your next design will look even better!
Make It Last
Daily Care
You want your custom phone case to look great every day. A little daily care goes a long way. Start by handling your phone with clean hands. Oils and dirt from your fingers can build up fast. Try not to toss your phone into bags or pockets with sharp objects like keys or coins. These can scratch your design or the case itself.
If you use your phone a lot, check your case for dust or lint. Wipe it off with a soft, dry cloth. This keeps your case clear and your design visible. You can also make a habit of removing your phone from the case once a week. Give both your phone and the case a quick check for any signs of wear.
Tip: Keep a microfiber cloth in your backpack or purse. You can wipe away smudges in seconds.
Cleaning Tips
Your phone case picks up grime over time. Regular cleaning keeps it looking fresh and helps your design last. Here’s a simple cleaning routine you can follow:
- Take your phone out of the case.
- Mix a few drops of mild dish soap with warm water.
- Dip a soft cloth or sponge into the soapy water. Wring it out so it’s damp, not soaking.
- Gently wipe the inside and outside of your case.
- For stubborn spots, use a cotton swab dipped in rubbing alcohol.
- Rinse the case with clean water and dry it with a lint-free towel.
Avoid harsh chemicals or rough scrubbing pads. These can damage your design or make the case cloudy. If you sealed your case with a clear coat, check the product instructions before cleaning.
| Cleaning Tool | Safe for Custom Cases? | Best Use |
|---|---|---|
| Microfiber Cloth | ✅ | Daily dust and smudges |
| Mild Soap & Water | ✅ | Weekly deep clean |
| Rubbing Alcohol | ✅ (small areas) | Stubborn stains |
| Bleach/Harsh Cleaners | ❌ | Never use |
Note: Always let your case dry completely before putting your phone back in.
Refresh or Reseal
Over time, your design might fade or peel. Don’t worry—you can refresh your case without starting from scratch. If you used inserts, swap them out for new photos, fabric, or paper. Want to update your look? Try new stickers or add a fresh layer of paint.
If you notice the clear coat wearing off, reseal your case. Clean the surface first. Apply a new layer of spray sealer, Mod Podge, or clear nail polish. Let it dry fully before using your phone again.
You can keep your case looking brand new with a little effort. Change up your design for each season or special event. Your phone case becomes a canvas for your creativity all year long.
Pro Tip: Store extra inserts and supplies in a small box. You’ll always have options ready when you want a change.
Design Your Own Custom Phone Case
Designing your own custom phone case feels easier than ever in 2025. You can use digital tools, add text or stickers, and see your ideas come to life with mockup generators. Let’s explore how you can make your phone case stand out with just a few clicks.
Digital Design Tools
You have so many options when it comes to digital design tools. Many websites and apps let you upload your own images, add graphics, and play with colors. You can drag and drop elements, try out different fonts, and even choose between glossy or matte finishes. Some tools offer pre-made templates, so you don’t have to start from scratch.
- Online design platforms let you upload your own images, add text, and use templates for quick results.
- You can pick from different materials and finishes to match your style.
- DIY machines like Cricut help you cut out shapes or letters with precision. Weeding tools make decal application smooth, and Mod Podge seals your design for durability.
A recent Nielsen Norman Group report highlights that users sometimes feel lost or overwhelmed by too many options. The best design tools guide you step by step, offer feedback, and help you avoid mistakes. Look for platforms that show you a preview of your case as you work. This way, you always know what your final product will look like.
Tip: Save your favorite designs as you go. You can always come back and tweak them later.
Text & Stickers
Adding text and stickers gives your phone case a personal touch. You can write your name, a favorite quote, or even a funny phrase. Most digital tools let you pick from dozens of fonts and colors. You can move the text around, resize it, and see how it looks before you commit.
Stickers work the same way. You can choose from a huge library of graphics—think emojis, flowers, or even your favorite sports team. Drag them onto your case, rotate them, and layer them for a unique look. If you want something truly special, upload your own images as stickers.
| Feature | What You Can Do |
|---|---|
| Text | Add, move, resize, change color |
| Stickers | Choose, layer, rotate, resize |
| Upload Images | Use your own photos as stickers |
Note: Try mixing text and stickers for a design that pops. You might add your initials next to a cool graphic or layer a quote over a background image.
Mockup Generators
Mockup generators let you see your design in real time. You can upload your own images, add text, and instantly preview how your phone case will look from every angle. This helps you spot any issues before you order or print your case.
Many mockup tools offer 3D views, so you can spin your case around and check the sides and corners. Some even let you switch between different phone models, so you know your design fits perfectly. These tools make designing fun and interactive. You get instant feedback and can share your mockups with friends or on social media.
- Mockup generators help you avoid surprises and make sure your design looks great in real life.
- You can experiment with different layouts and colors until you find the perfect match.
If you love to share your creativity, take a screenshot of your mockup and post it online. You might inspire someone else to design their own custom phone case!
DIY Phone Case Ideas

Collage & Inserts
You can turn your clear case into a mini art gallery with a collage. This diy phone case idea lets you show off your favorite photos, magazine clippings, or even ticket stubs. Start by gathering small, flat items that mean something to you. Cut them to fit your case using a template. Arrange the pieces on a sheet of paper or thin cardstock. Try different layouts until you find one you love. Once you’re happy, secure the collage with a little glue or double-sided tape. Slide the finished insert into your case. You can swap out the collage whenever you want a new look. This method makes your custom phone case feel fresh and personal every time.
Tip: Use washi tape or stickers to add pops of color and texture to your collage.
Pressed Flowers
Pressed flowers bring a touch of nature to your diy phone case. Pick small, flat flowers or leaves from your yard or a local park. Press them between heavy books for a week or use a flower press if you have one. Once dry, arrange the flowers on a clear insert or directly inside your case. You can seal them with clear tape or a thin layer of Mod Podge to keep them in place. This style looks delicate and unique. It’s a great way to celebrate spring or remember a special day outdoors. Many people love this idea because it’s simple, eco-friendly, and always one-of-a-kind.
Watercolor & Fabric
If you want a soft, artistic vibe, try watercolor or fabric inserts. Paint a small piece of watercolor paper with your favorite colors. Let it dry, then cut it to fit your case. The colors blend and flow, giving your diy phone case a dreamy look. For fabric, pick a pattern that matches your style. Cut the fabric to size and use double-sided tape to keep it flat. You can even layer fabric over a watercolor background for extra depth.
Makers love these ideas because they’re easy to try and use materials you already have at home. Projects like the Sugru “Silly Putty Tech Protectors” show how much people enjoy making a diy phone case from simple supplies. You get bragging rights when you finish your own custom phone case, and you can show it off to friends. These projects are fun, creative, and perfect for anyone who wants a case that stands out.
Seasonal Themes
You can celebrate every season with a diy phone case that matches your mood and the time of year. Seasonal themes keep your phone looking fresh and fun all year long. You don’t need to be an artist to pull this off. Just pick a theme, gather a few supplies, and let your creativity shine.
Spring brings flowers, pastel colors, and new beginnings. Try using pressed flowers, light green washi tape, or stickers with butterflies and rainbows. You can paint tiny blossoms or add a photo of your favorite spring memory.
Summer calls for bright colors and bold patterns. Think about using neon markers, tropical stickers, or even a small piece of beach-themed fabric. You might add a sun, palm trees, or waves. If you love travel, print a mini map or a ticket stub from your summer adventure and slip it inside your diy phone case.
Fall is all about warm tones and cozy vibes. Grab orange, red, and gold markers or paint pens. Use leaf-shaped stickers or cut out paper leaves. You can even press a real leaf and seal it under a clear insert. Try plaid fabric or a photo from a pumpkin patch for a personal touch.
Winter gives you a chance to use cool blues, silvers, and whites. Snowflake stickers, glitter tape, or a piece of sparkly wrapping paper work great. Draw a snowman or add a tiny holiday card. If you want a festive look, layer in some metallic accents or a piece of ribbon.
Here’s a quick table to spark your ideas:
| Season | Color Palette | Materials to Try | Fun Motifs |
|---|---|---|---|
| Spring | Pastels, green, pink | Pressed flowers, washi tape | Butterflies, blooms |
| Summer | Neon, blue, yellow | Fabric, travel photos, stickers | Sun, waves, fruit |
| Fall | Orange, red, gold | Leaves, plaid, paper cutouts | Pumpkins, acorns |
| Winter | Blue, silver, white | Glitter, ribbon, holiday cards | Snowflakes, stars |
Tip: Store your seasonal inserts in a small envelope. You can swap them out as soon as the weather changes or a holiday rolls around.
You can even mix and match themes. Maybe you want a diy phone case that celebrates your birthday month or a special event. Try adding a calendar page, a favorite quote, or a tiny charm. The best part? You can change your diy phone case as often as you like. Every season brings a new chance to show off your style and creativity.
If you share your seasonal designs online, you might inspire someone else to try a diy phone case project. Don’t be afraid to experiment. Your phone case can become a mini celebration of every season!
Show Off Your Custom Phone Case
Take Photos
You just finished your custom phone case, so now it’s time to show it off! Grab your phone or a camera and snap some great photos. Good lighting makes a big difference. Try taking pictures near a window or outside on a sunny day. Lay your phone on a clean background. White paper, a wooden table, or even a colorful notebook can work well. Hold your phone at different angles to capture the details. If you added layers or textures, get close-up shots. You can also take a photo of your phone in your hand or next to your favorite accessories. This helps your design stand out and gives your photos a personal touch.
Tip: Wipe your phone case before taking photos. Smudges and fingerprints can show up in pictures.
Share Online
You worked hard on your design, so why not share it with the world? Post your photos on social media platforms like Instagram, TikTok, or Pinterest. Use hashtags like #DIYPhoneCase, #PhoneCaseDesign, or #CustomPhoneCase to reach other creative people. Write a short caption about your inspiration or the materials you used. You can even make a quick video showing your process from start to finish. People love seeing before-and-after shots. If you feel proud of your work, tag your favorite brands or artists. Sometimes they feature fan creations on their pages!
Here’s a quick checklist for sharing online:
- Choose your best photo
- Add a fun caption
- Use 2-3 relevant hashtags
- Tag brands or friends
- Respond to comments and questions
Join DIY Groups
You don’t have to create alone. Many people love making custom phone cases, and you can find them in online DIY groups. Search for crafting communities on Facebook, Reddit, or Discord. These groups let you share your designs, ask for advice, and get feedback. You might find new ideas or learn about the latest trends. Some groups host challenges or swaps, so you can trade designs with others. Joining a group helps you stay inspired and meet friends who share your passion for creativity.
Note: Always follow group rules and be kind when giving feedback. Everyone starts somewhere, and your encouragement can make someone’s day.
You can turn your custom phone case into a conversation starter. Show it off, share your story, and connect with others who love to create!
Customizing a clear phone case feels simple and fun. You can try new materials, swap designs, and show off your creativity. Mistakes happen, but they help you learn and improve. Share your unique case online or with friends. Inspire others to get creative, too.
Ready to make your own? Grab a clear case and start your DIY project today! Your phone deserves a look as unique as you are.
FAQ
How do I stop my clear phone case from turning yellow?
You can pick a case with anti-yellowing features. Clean your case weekly with mild soap and water. Keep it out of direct sunlight. UV rays and heat speed up yellowing.
Can I remove permanent marker from my phone case?
Yes! Try rubbing alcohol or a magic eraser. Gently rub the area until the marker fades. Test a small spot first to avoid damage.
What’s the best way to make my design last longer?
Seal your design with a clear acrylic spray or Mod Podge. Let it dry fully before using your phone. This helps protect against scratches and fading.
Can I use hot glue or super glue on my phone case?
Avoid hot glue and super glue. They can damage your case or leave cloudy marks. Use double-sided tape or craft glue for decorations instead.
Will customizing my case affect wireless charging?
Most customizations work fine. Keep decorations thin and avoid metal pieces. Thick layers or magnets can block wireless charging.
How often should I clean my custom phone case?
Clean your case once a week. Use a soft cloth and mild soap. This keeps your design bright and your case clear.
Can I swap out inserts without damaging my case?
Absolutely! Inserts like photos or fabric slide in and out easily. Use templates for a perfect fit. No glue needed.
What should I do if my stickers start peeling?
Press them down again or add a thin layer of clear nail polish or Mod Podge. This helps them stick longer and keeps your design looking fresh.